Official game
Play Dodo Duckie
This game is hosted by Steam. Continue to the official page to play or download it.
Buy on SteamOverview
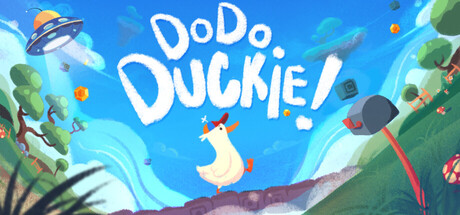
Dodo Duckie is a wholesome puzzle-platformer from solo developer BornMonkie (published by Solo Game Entertainment). You play as Dodo, a duck whose chicken family gets yoinked into the sky by a malfunctioning alien tractor beam. Armed with a magical cap from Capie the Capybara, Dodo can switch between 2D side-scrolling and 3D third-person views on the fly. Each perspective reveals different paths, platforms, and secrets.
Launched July 23, 2026 on Windows and Linux (Steam Deck Verified) at $9.59. Supports 11 languages. No generative AI used — the developer explicitly certifies this.
| Stat | Value |
|---|---|
| Developer | BornMonkie |
| Publisher | Solo Game Entertainment |
| Release | Jul 23, 2026 |
| Price | $9.59 |
| Platforms | Windows, Linux (Steam Deck only Linux) |
| Genre | Puzzle Platformer, Adventure |
| Playtime | 3–5h main, 6–8h completionist |
| Difficulty | Medium |
| Features | Steam Achievements, Cloud Saves, Family Sharing, Full Controller |
Getting Started
Dodo Duckie is a short, generous puzzle-platformer — 3–5 hours for the main path, 6–8 for full completion. The core ask is simple: master the perspective switch. The cap between 2D and 3D is the entire game, so spend your first 30 minutes internalizing how geometry changes between views.
First-session priorities:
- Follow the tutorial planet's rhythm. Planet 1 (The Farmlands) teaches movement, quacking, and basic switching at a gentle pace. Don't rush it — the habits you build here carry through the whole game.
- Learn to read glow tells. Objects that react to perspective switches have a glowing outline. If you're ever stuck, scan the room for glowing objects — they're your hint system.
- Glide often, but land often too. Glide stamina recharges on solid ground. Plan routes that touch down between long glides instead of chaining one endless float.
- Quack at everything. The Quack button scares small aliens and reveals hidden interactions. It costs nothing — use it liberally in new areas.
- Collect stardust early. Every 50 pieces permanently boost your cap's recharge rate by 5% (up to ~40%). Grabbing clusters as you see them makes late-game gauntlets dramatically more forgiving.
Core Mechanics
Perspective Switching (The Cap)
The magic cap shifts Dodo between two dimensions — a 2D side-scroller view and a 3D third-person view. Geometry changes between them. Platforms that exist in one view vanish in the other. Paths blocked in 2D open in 3D. Secrets hidden in one perspective are exposed in the other.
Stardust energy. The cap runs on stardust. Each switch consumes energy. The gauge recharges automatically (~3 seconds between switches early game). Collecting stardust clusters permanently increases the recharge rate by 5% per 50 pieces, up to a ~40% total bonus.
Glow tells. Objects that react to perspective switches have a glowing outline. If you're stuck, look for glowing objects — they signal that switching will change something nearby.
Switch discipline. Never switch mid-air unless you've memorized the landing. If you jump in 2D and switch to 3D, the platform you aimed for might not exist in 3D. The game is forgiving (failed switches drop you to a safe platform below), but it costs time.
Movement Kit
| Ability | Unlock | Use Case |
|---|---|---|
| Waddle | Default | Basic movement. Top speed is slow — embrace it. |
| Jump | Default | Standard jump height. Enough for most gaps. |
| Glide | Default | Hold jump mid-air. Slows descent. Limited stamina bar visible around Dodo. Essential for 80% of platforming. |
| Splash | Planet 1 | Water traversal. Dodo paddles on surfaces. Press down to dive briefly. |
| Float | Planet 3 | Buoyancy boost from colored platforms. Drift upward, steer horizontally. |
| Flop | Planet 2 | Ground-pound. Press down + jump mid-air. Breaks fragile floors, stuns small aliens. |
| Quack | Default (Q key) | Scares nearby aliens. Also calms Dodo — the game is serious about this. |
Glide management. Glide stamina recharges on solid ground. Plan routes so you touch ground between long glides. The cap sold by Capie in Planet 2 increases glide distance by 30% — buy it before tackling Sky Gardens.
Puzzle Types
-
Bridge puzzles. A gap too wide to jump. In 2D the gap is narrow enough. In 3D there's a floating platform above. Switch to 2D to cross, switch to 3D to climb.
-
Key hunt puzzles. A locked door exists in one perspective. The key is visible in the other but unreachable. Track its position across both views and grab it when it aligns.
-
Alien diversion. Quack at small aliens to scare them. Larger aliens need luring — appear in one dimension, switch to the other, and run past while they investigate the spot you just left.
-
Weight puzzles. Pressure plates exist in one dimension only. Push a crate onto the plate in one view, then switch. The crate stays — now you can cross in the other dimension.
-
Timing chains. Late-game gauntlets: switch to 3D to see the path, jump half the gap, switch to 2D mid-air to land on a hidden platform, jump again, switch back to 3D to grab a ledge. These sequences take practice.
Planet-by-Planet Breakdown
Planet 1 — The Farmlands (Tutorial)
Playtime: 20–30 minutes. Chickens: 1. Photo spots: 3. Stardust clusters: 5.
The tutorial planet. Teaches movement, quacking, and basic perspective switching. The geometry is simple — flat terrain, a few elevated platforms, one alien encounter.
Speedrun route: Jump over the first fence, glide to the elevated platform, switch to 3D to spot the chicken on the far ledge. Do not explore — the tutorial objects are skippable. Clear in ~4 minutes.
100% route: Every path in Farmlands has at least one collectible. Start by clearing the right side (photo spot #1 behind the barn), then the left side (photo spot #2 near the windmill), then the center (stardust clusters under the bridge). Photo #3 is on the roof of the final building — use 3D to spot the climbable ledge.
Missable warning: Photo spot #1 is only visible in 2D mode when standing behind the red barn. If you switch to 3D there, the prompt disappears. Check both perspectives at every camera icon.
Planet 2 — Glitch Gulch (Timing Puzzles)
Playtime: 30–45 minutes. Chickens: 2. Photo spots: 3. Stardust clusters: 5.
A corrupted zone where reality flickers. Platforms appear and disappear on a timer. This planet teaches timing-based switching.
Core challenge: Platforms in Glitch Gulch cycle between dimensions on a 4-second timer. You need to observe a full cycle before jumping. Rushing leads to falls.
Flop utility: Fragile floors are everywhere in Glitch Gulch. Flopping reveals hidden passages and alternate routes. Some stardust clusters are only accessible by breaking through a floor in 2D, then switching to 3D mid-fall to grab them before landing.
Alien behavior: Glitch Gulch introduces the large aliens that charge at you. You can't outrun them in a straight line. Lure them toward a wall, then Flop at the last second. They slam into the wall and stun themselves for 5 seconds.
Chicken #1 location: After the first major timing puzzle, go right instead of following the main path. Switch to 3D to see the chicken on a floating platform above. Jump in 2D (the platform is there), switch to 3D mid-jump to land on the correct platform.
Chicken #2 location: Near the end of the planet, there's a room with four exits. Take the bottom-right exit in 3D mode. The path is invisible in 2D.
Planet 3 — Crystal Caverns (Light Puzzles)
Playtime: 45–60 minutes. Chickens: 2. Photo spots: 3. Stardust clusters: 5.
Dark underground caves with bioluminescent crystals. Crystals glow differently in 2D vs 3D. Some paths are only visible in one dimension's lighting.
Light mechanics: In 2D, crystals emit a warm orange glow that illuminates platforms. In 3D, they emit a cool blue glow that reveals different platforms. The crystals don't move — the light they cast changes based on perspective.
Navigation trick: If you can't see where to go, switch to the other view and look for crystal light. A faint glow means a platform exists there in that dimension. The game uses this as a breadcrumb trail.
Float sections: Colored buoyancy platforms appear in Crystal Caverns' water sections. In 2D, the float platforms are horizontal lines. In 3D, they're vertical columns. Use 2D for horizontal traversal, 3D for vertical climbing.
Chicken #1: In the first large cavern, swim to the bottom-left corner in 3D mode. There's an underwater cave entrance only visible when the crystal above casts blue light.
Chicken #2: After the Float tutorial section, backtrack to the previous room and switch to 2D. A path appears on the upper ledge that was wall in 3D.
Planet 4 — Sky Gardens (Wind Puzzles)
Playtime: 45–60 minutes. Chickens: 3. Photo spots: 3. Stardust clusters: 5.
Floating islands above the clouds. Wind currents affect movement. The perspective switch changes wind direction.
Wind mechanics: In 2D, wind blows sideways (pushes you left or right). In 3D, the same wind current blows upward (lifts you). Use 2D wind for horizontal gaps. Use 3D wind to reach high platforms.
Recommended purchase before Sky Gardens: Capie's Glide Cap (costs 30 stardust). Increases glide distance by 30%. Several gaps in Sky Gardens are impossible without it or require perfect wind alignment.
Chicken routing: Sky Gardens has 3 chickens, the most of any planet. Two are on the main path (follow the wind currents — the third wind current in 3D always leads to a chicken). The third is hidden: after the largest island, drop off the right edge in 2D mode. A wind current catches you and carries you to a secret island.
Photo spots: All three photos in Sky Gardens require specific wind current + perspective combinations. Photo #1: stand on the highest island in 3D mode. Photo #2: ride the upward wind in 3D to the floating debris. Photo #3: jump off the left edge of the final island in 2D mode.
Planet 5 — The Core (Mothership)
Playtime: 60–90 minutes. Chickens: 3 (including final boss rescue). Photo spots: 3. Stardust clusters: 5.
The alien mothership. Tight corridors, complex multi-switch puzzles, and the final confrontation.
No wind, no water. The Core removes movement helpers. You rely entirely on perspective switching and puzzle-solving.
Puzzle density: The Core has more puzzles per square meter than the previous four planets combined. Expect timing chains of 4–5 switches. A typical sequence: switch to 2D → jump → switch to 3D → land → switch to 2D → jump over gap → switch to 3D → press button.
Final boss (spoiler-light): The boss is not a combat encounter. It's a puzzle that tests everything you've learned — perspective switching under pressure, gliding accuracy, and timing chains. The boss has three phases. Each phase adds one more switch to the required sequence. Breathe. Quack if you need to. The game pauses the boss timer when you quack.
Collectibles Strategy
Stardust — Priority Order
| Priority | Why | Location |
|---|---|---|
| 1st | Recharge rate upgrade (50 pieces) | Farmlands + Glitch Gulch (easy to reach) |
| 2nd | Recharge rate upgrade (100 pieces) | +Crystal Caverns |
| 3rd | Capie's Glide Cap (30 pieces) | Buy before Sky Gardens |
| 4th | Recharge rate upgrade (150 pieces) | +Sky Gardens |
| 5th | Remaining upgrades | Any remaining clusters |
Stardust clusters are always placed near the main path but require a perspective switch to reach. If you see stardust floating in one view but can't reach it, switch — the platform you need is in the other dimension.
Maximum recharge boost: 40% total. After that, stardust is only for Capie's shop items (cosmetic caps).
Photos — Completionist Path
15 total photos (3 per planet × 5 planets). Finding all 15 unlocks a special ending cutscene.
Efficiency strategy: Don't hunt photos on your first pass through a planet. It doubles your time. Instead:
- Clear the planet normally.
- After finishing the game, replay each planet in photo-hunt mode.
- The game tracks which photos you've found. The pause menu shows missing photos per planet.
Photo spots are always marked by a glowing camera icon visible in one perspective. If you don't see it, switch.
Chickens — Golden Eggs
10 chickens total. Each rescued chicken appears in the hub. The hub shows empty perches for missing chickens — easy to track.
Golden Eggs: The 100% achievement likely requires finding all golden eggs (the achievement description mentions "All Golden Eggs" based on YouTube video titles). Golden eggs are ultra-hidden collectibles, one per planet, that require solving an optional non-obvious puzzle. Their locations:
- Farmlands: After rescuing the chicken, backtrack to the starting area. In 2D mode, the tree near your house has a golden egg visible in the branches. Jump + Glide from the fence.
- Glitch Gulch: In the room with four exits, take the top-right exit in 2D mode. The egg is on a platform that only exists for 2 seconds per cycle.
- Crystal Caverns: Dive to the bottom of the deepest water pool in 3D mode. The egg is on a ledge behind a crystal formation.
- Sky Gardens: Ride the third wind current (in 2D mode, blowing right) to the end. The egg is on a tiny cloud platform.
- The Core: In the room before the final boss, switch to 2D and jump into the vent on the ceiling. The egg is in a hidden crawlspace.
Speedrun Route
After completing the game, speedrun mode unlocks. Times are tracked per planet and overall.
Key speedrun techniques:
-
Glide cancels. Tap jump mid-glide to cancel the glide and drop straight down. Saves ~0.5 seconds per descent compared to waiting for the glide to end naturally.
-
Switch-skip. Some puzzle gates can be skipped by switching perspectives at the exact moment the gate animates. If you time it right, the gate opens in one dimension but you're already in the other. This skips the wait for the gate animation.
-
Don't collect. Speedrun mode only requires reaching the chicken. Ignore stardust, photos, and golden eggs. Every collectible detour costs 15–45 seconds.
-
Quack sparingly. The quack animation lasts 1.5 seconds. Use it only when necessary against aliens blocking the path.
Estimated speedrun times (per planet):
- Farmlands: 3–4 minutes
- Glitch Gulch: 5–7 minutes
- Crystal Caverns: 7–9 minutes
- Sky Gardens: 8–10 minutes
- The Core: 10–15 minutes
- Total: 35–45 minutes (competitive)
Advanced Tips
Stardust banking. You can hold more stardust than you need for a single upgrade. Save up 80 before visiting Capie. Buy the Glide Cap (30) and one recharge upgrade (50) in the same visit. This saves a trip.
The quack reset. If you fall into a pit, the game respawns you at the last safe platform. But the fall itself takes time. Press Q (quack) during the fall — it doesn't prevent the fall but it recenters you mentally. The game acknowledges this mechanic in its tutorial text.
Wall jumping. While Dodo can't wall-jump in the traditional sense, you can jump toward a wall, switch perspectives, and jump again if the wall geometry changes. This "perspective wall jump" is essential for three specific golden egg locations.
Alien pathing. Aliens follow predictable patrol routes. Observe them for one full cycle before moving. Their patrol is slightly randomized in timing but consistent in path. Once you know the route, you can time your movement to pass within one duck-length of them without triggering their alert state.
Capie's cryptic hints. Between planets, Capie gives advice. If he says "the light changes everything in the deep places" — that's about Crystal Caverns' light puzzles. If he says "up becomes sideways and sideways becomes up" — that's Sky Gardens' wind mechanics. Pay attention, his hints are always accurate.
Step-by-Step Strategy
Sequence 1: Clean First-Pass Planet Route
- Enter a planet with full stardust. Do not spend it mid-level.
- Follow the main path until you hit a locked or unreachable puzzle element.
- Scan the room for glowing outlines. Glowing objects are your hint system.
- Switch perspectives once per glowing object. If nothing changes, switch back and move on.
- Rescue the chicken first. Collect stardust only if it is directly on the route.
- Note the photo spots you pass, but do not detour for them on this pass.
- Exit via the main path. Replay the planet later in photo-hunt mode.
Sequence 2: The 2D-3D Bridge Crossing
- Approach a gap that is too wide for a single jump in your current view.
- Switch to 2D and check if the gap narrows. If it does, jump across in 2D.
- If the gap stays wide, switch to 3D and look for a floating platform above.
- Jump in 3D, grab the platform, then switch to 2D mid-air.
- Land on the 2D-only path that the platform revealed.
- Switch back to 3D only after your feet are on solid ground. Never switch mid-fall without a memorized landing.
Sequence 3: Key Hunt Across Dimensions
- Find a locked door. Note which perspective it exists in.
- Switch to the other view. The key is usually visible but unreachable there.
- Track the key's position across both views. It does not move, the geometry around it does.
- Plan a route that approaches the key from the perspective where it is reachable.
- Grab the key, then return to the door in the perspective where it is locked.
- Open it and quack at whatever is behind it before committing to the room.
Sequence 4: Glitch Gulch Timing Chain
- Watch a full 4-second platform cycle before moving. Do not jump on first sight.
- Time the first jump to land as the platform materializes.
- Switch perspectives immediately on landing to lock the platform in the other dimension.
- Run the length of the platform, then switch back before it de-materializes.
- For the chicken on the floating platform: jump in 2D, switch to 3D mid-jump.
- Land, grab the chicken, and wait for the next cycle before descending.
Sequence 5: Sky Gardens Wind Routing
- Equip Capie's Glide Cap before entering Sky Gardens. It costs 30 stardust and is mandatory for the widest gaps.
- In 2D, use wind for horizontal movement. Let the current push you across gaps.
- In 3D, use the same current for vertical lift. Ride it up to high platforms.
- For the hidden chicken: drop off the right edge of the largest island in 2D mode.
- A wind current catches you and carries you to the secret island. Do not switch perspectives during the ride.
- Collect the chicken, then ride the current back or find the one-way exit.
Sequence 6: The Core Final Gauntlet
- Enter the final room with full stardust and a clear head. There is no wind or water to save you.
- Read the first puzzle chain. Count the switches it needs before acting.
- Execute the chain slowly: 2D jump, 3D land, 2D gap, 3D button.
- If you miss a step, do not panic-switch. Return to the last safe platform and reset.
- In the final boss's three phases, expect one extra switch per phase. Breathe between chains.
- Quack if you need to. The boss timer pauses while you quack.
Common Mistakes
| Mistake | Why It Hurts | Fix |
|---|---|---|
| Switching mid-air without a plan | The landing platform may not exist in the other view | Only switch mid-air when you have memorized the landing |
| Hoarding stardust | Recharge upgrades make late gauntlets forgiving | Bank 80, then buy the Glide Cap and an upgrade in one Capie visit |
| Ignoring glow tells | Glowing objects are the built-in hint system | Stuck? Scan the room for glowing outlines |
| Hunting photos on the first pass | Doubles your time per planet | Clear the planet, then replay in photo-hunt mode |
| Skipping Capie's Glide Cap | Several Sky Gardens gaps are impossible without it | Buy it before Planet 4, no exceptions |
| Quacking at nothing | The quack animation costs 1.5 seconds in speedruns | Quack only when an alien blocks the path or a puzzle needs it |
| Fighting the perspective swap | The game has a known quirk where Dodo drifts slightly when you swap quickly | Pause a beat between rapid switches and re-center before jumping |
FAQ
Q: What's the exact number of collectibles? A: 5 planets × 5 stardust clusters each (25 clusters, ~250 stardust total), 5 golden eggs, 15 photo spots, 10 chickens.
Q: Can I go back to planets after completing them? A: Yes. The hub lets you replay any planet at any time. Progress carries over.
Q: Is there a reason to replay besides achievements? A: Speedrun mode unlocks after the credits. It tracks per-planet and total times.
Q: Does the game have difficulty options? A: No difficulty settings. The puzzle challenge is fixed. The game never requires frame-perfect inputs — it's designed to be solvable by patient players.
Q: Steam Deck performance? A: 60 FPS locked at native resolution. No tinkering needed. Only Steam Deck is supported among Linux distros.
Q: How long is 100% completion? A: 6–8 hours. Most of the extra time is photo hunting and golden egg puzzles.