Daily Pick
One deeply researched guide worth reading today.
A practical route through the systems that matter most, written to help new players make confident decisions quickly.
Overview
Rite of the Veilstorm is a narrative adventure from solo developer EmptyPotatoSack, built in Godot and published free on itch.io. You play Myrin, a soul summoned by the Keepers, five ancient entities who guard the Codex, the artifact that holds reality together. The Codex is failing. Reality is tearing at the seams. Your task is to complete five trials, one for each Keeper, then decide the fate of existence itself.
This is not a game about reflexes. There is no combat, no fail state, no timer. The challenge is emotional and philosophical. Every dialogue choice quietly rewrites the ending you see, and the game tracks far more of your decisions than it lets on. A single run takes 30 to 60 minutes, but the game is designed to be played twice. Completionists can spend 3 to 4 hours unlocking every hidden journal entry, lore tablet, and contextual ending variant.
Platform: Browser (HTML5/WebGL2) + Windows download (225 MB) Price: Free Engine: Godot, no generative AI used Status: In development, fully playable with both endings complete Developer: EmptyPotatoSack Length: 30-60 minutes per run, 2-4 hours for 100% completion
Who it is for: Fans of walking-simulator storytelling, choice-driven narrative games, and philosophical sci-fi/fantasy. If Firewatch, What Remains of Edith Finch, or the quieter routes of Disco Elysium worked for you, this sits in the same emotional space.
Difficulty: Zero mechanical difficulty. The real challenge is narrative. Hidden choice flags, two main endings, and roughly a dozen contextual variants mean the strategy here is about thematic consistency, not twitch skill.
Getting Started: The First 30 Minutes
The game opens with a short text prologue establishing the Codex and the Veilstorm, then drops you into the first Keeper's domain. There is no tutorial prompt. The controls are simple enough to discover organically: WASD to move, E to interact. The first five minutes are deliberately quiet. You walk, you read, you meet the Keeper of the Veil.
Pacing tip: Do not sprint through the opening. The prologue plants three details that pay off later:
- The crack pattern on the Codex's pedestal. Compare it with the final scene. It matches the ending you get.
- The number of Keepers in the opening mural. There are five figures, but one is drawn differently. That foreshadows Trial 5.
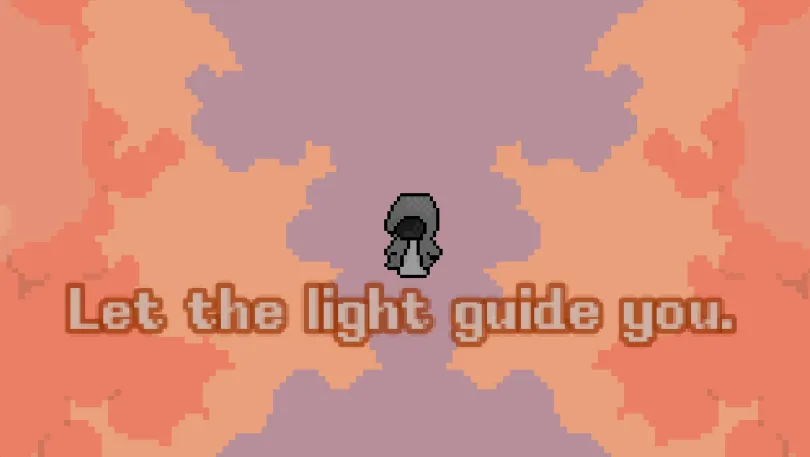
- The color palette of the opening area. Each Keeper's domain has a signature color. The opening area is neutral gray, which is itself a statement.
Beginner Mistakes to Avoid
| Mistake | Why It Hurts |
|---|---|
| Skipping dialogue on first run | Choice flags hide inside dialogue. Rushing means you miss the emotional setup that makes the ending land |
| Not checking the journal (Tab) | The journal records every hidden entry. Several are missable if you do not revisit locations after trials |
| Assuming the game is linear | Trial domains are small but dense. Every domain has hidden interactions most players miss on the first pass |
| Playing "perfectly" | The game punishes nothing. The most interesting dialogue appears when you pick the "wrong" or "uncertain" answers |
| Expecting a third ending | There are two endings with contextual variants. The variants are worth seeing, but there is no secret third path |
First-Run Route Recommendation
Play your first run blind. Do not consult guides mid-run. The game's design assumes you make choices from the gut, see one ending, then feel the pull to replay with the other philosophy in mind. The two-ending structure is the core of the design. A guide-synced first run robs you of the emotional whiplash that makes the second run meaningful.
After your first ending, use the replay strategy below to methodically unlock everything.
Complete Controls Reference
| Input | Action |
|---|---|
| WASD / Arrow Keys | Movement (2D top-down plane) |
| E / Space | Interact with objects, NPCs, Keepers |
| Tab / Pause (Backspace) | Open journal |
| Escape | Pause menu |
The interaction system is proximity-based. When you are close to an interactable object or NPC, a prompt appears. No complex combos, no timing windows.
Keyboard nuance: E and Space both interact, but Space also confirms dialogue choices in some menus. If a dialogue choice window appears and E does nothing, try Space. The game never tells you this.
Core Mechanics: How the Game Works Under the Hood
The Choice Flag System
The most important hidden system. Behind the scenes, every significant dialogue choice sets one or more flags:
- Preservation flags: accumulate when you favor stability, duty, memory, order
- Liberation flags: accumulate when you favor change, letting go, truth over comfort
- Empathy flags: accumulate when you help others, acknowledge suffering, act from feeling
- Conviction flags: accumulate when you answer decisively, commit to a principle, refuse to hedge
These flags are never shown in the UI. They feed into:
- Which contextual variants of the ending cutscene you get
- Which mirror visions appear in Trial 4
- Which journal entries unlock
- The Keeper's final tone in each trial's closing scene
The critical insight: You do not need to max out any flag. The game is not checking thresholds like an RPG. It checks which flag is dominant. A run where you lean 60/40 toward preservation gets a different flavor of the Sacrifice ending than a run where you were 90/10. The ending text stays the same; the framing changes.
The Journal System
The journal (Tab) tracks three categories:
- Lore entries: unlocked by reading tablets, interacting with hidden objects, and asking the right dialogue questions
- Trial records: a summary of each trial's outcome based on your choices
- Hidden entries: the rarest category, usually triggered by returning to a location after a trial or by specific choice combinations
There are 14 hidden journal entries total. The game never tells you how many exist. Finding all 14 is the closest thing the game has to a 100% completion requirement.
Checkpoint and Replay System
The game saves checkpoints at each trial start. After completing a trial once, you can reload from its checkpoint to replay that trial with different choices without restarting the whole run. This is essential for completionists. You can redo Trial 2 three times to see all three memory dilemmas resolved differently, then continue forward with the set of choices you want for the ending.
Important: Reloading a checkpoint overwrites your choices for that trial only. Flags from trials you have not touched since the checkpoint remain as they were. Plan your replay order carefully.
The Five Trials: Complete Breakdown
Each trial takes place in a distinct domain. Each Keeper has a unique visual design, a distinct philosophy, and a specific method of testing you.
Trial 1: The Trial of the Veil
Keeper: The Keeper of the Veil, a robed figure surrounded by shifting mist. Their domain is a fog-choked liminal space where objects appear and disappear.
The Test: The Keeper shows you two contradictory truths and asks which one you accept. Example: a memory of a peaceful village versus a memory of the same village burning, both presented as equally real.
| Choice | Keeper Response | Narrative Impact |
|---|---|---|
| "I accept both as true" | "The Veil does not discriminate" | Unlocks extra dialogue about perception; sets a contemplative tone |
| "Only one can be real" | Challenges you to explain your reasoning | Sets a decisive tone for later trials |
| "Neither, this is a trick" | "The first lesson: doubt everything" | Triggers a hidden lore entry about the Codex's creation |
Environmental Details: The mist contains faint silhouettes. Walk toward them. Some vanish, some stay. The ones that stay are interactable and show brief flashes of the world before the Codex began failing. These are the only glimpses of normalcy in the entire game.
Hidden Interaction: Return to the starting area after speaking with the Keeper. A glowing symbol has appeared on the ground. Interact with it for a journal entry: "The Veil is not a barrier. It is a filter."
Trial 2: The Trial of Memory
Keeper: The Keeper of Memory, a stone-faced entity seated among floating tablets. Their domain is a library of ruins: shattered pillars covered in carved script.
The Test: Examine fragments of history and decide what deserves to be remembered and what should be forgotten. The Keeper presents three scenarios, each with a preserved record and a suppressed one.
| Choice | Keeper Response | Narrative Impact |
|---|---|---|
| Preserve the painful truth | "Memory is not comfort. It is duty." | Strengthens the preservation thread |
| Forget the painful truth | "Some weights are not meant to be carried." | Strengthens the new beginning thread |
| Ask why you must choose at all | "Because the Codex has limits." | Unlocks a lore tablet about the Codex's storage capacity |
The Three Memory Dilemmas:
- A great victory won by cruel means. Do you remember the victory or the cruelty?
- A loving relationship that ended in betrayal. Do you remember the love or the betrayal?
- A scientific discovery that caused suffering. Do you remember the discovery or the suffering?
Lore Tablets: There are seven stone tablets in this domain. Reading all seven unlocks a journal entry titled "The First Keeper's Regret," which reveals that the original architect of the Codex warned the Keepers that no system lasts forever.
Hidden Interaction: After making your choices, interact with the cracked stone pillar behind the Keeper. It shows a vision of a previous chosen one who failed the trials. You are not the first Myrin.
Trial 3: The Trial of Burden
Keeper: The Keeper of Burden, a weeping figure whose tears fall upward. Their domain shows visions of trapped spirits, each frozen in a moment of suffering.
The Test: Three spirits, each with a story and a request. You can help them, ignore them, or refuse. The Keeper watches, then asks: why did you help?
| Spirit | Story | Request | If You Help | If You Refuse |
|---|---|---|---|---|
| The Lost Child | Separated from family as the Veilstorm approached | Guide them to a safe place | The child thanks you; the Keeper asks about compassion | The child fades; the Keeper asks about indifference |
| The Betrayed Soldier | Commander abandoned them during a battle | Hear their story and acknowledge their pain | They find peace; the Keeper asks about validation | They remain trapped; the Keeper asks about justice |
| The Forgotten Artist | Works destroyed by the Codex's decay | Preserve one of their surviving pieces | You receive a fragment, a physical token that carries to the final scene | The piece crumbles; the Keeper asks about legacy |
The Keeper's Final Question: After you finish with all three spirits, the Keeper asks directly: "Did you help them because you felt their pain, or because you felt you had to?"
- Answer "Because I felt their pain" → the Keeper nods, satisfied
- Answer "Because I had to" → the Keeper warns that obligation without empathy is hollow
- Answer "Both" → the most nuanced response: "That is the truest answer. We act from both."
Hidden Interaction: After the Keeper speaks their final lines, return to each spirit's location. The Lost Child has left a small token. The Betrayed Soldier's armor has become a memorial marker. The Forgotten Artist's fragment glows. Interacting with all three again unlocks a journal entry: "To carry another's burden is to understand that all suffering is connected."
Trial 4: The Trial of Conviction
Keeper: The Keeper of Conviction, a faceless entity surrounded by mirrors that show alternate versions of Myrin, the Keepers, and the Codex itself.
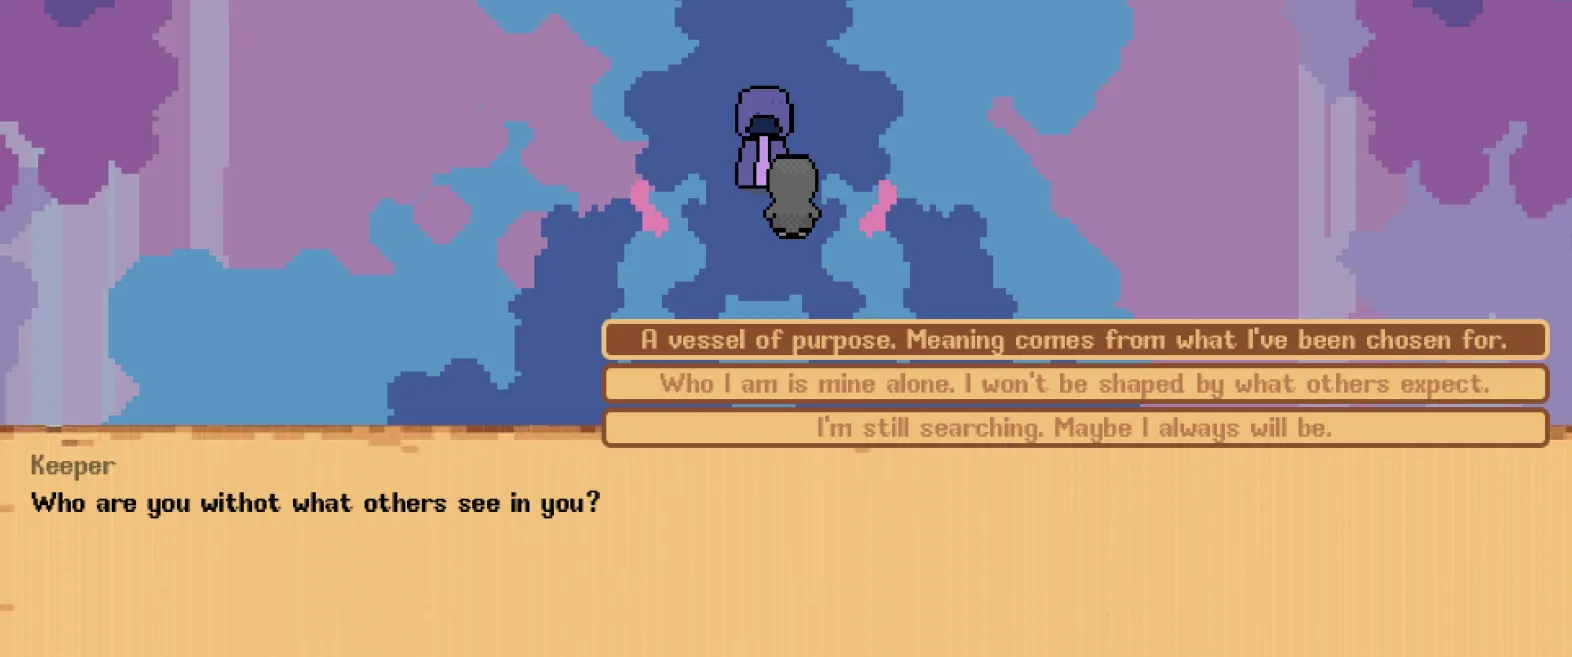
The Test: The Keeper presents a hypothetical: the Codex can be saved, but only if one of the other four Keepers is sacrificed. You must choose which principle to discard.
| You Sacrifice | Which Principle Falls | Narrative Ramification |
|---|---|---|
| Keeper of the Veil | Perception and uncertainty | The final choice frames certainty as dangerous |
| Keeper of Memory | History and preservation | The Codex's historical records are described as flawed |
| Keeper of Burden | Empathy and connection | The ending frames isolation as the cost of survival |
| Keeper of Conviction | Belief and commitment | The ending questions whether any principle is worth dying for |
The Mirror Mechanic: Before choosing, examine all four mirrors. Each shows a possible future. The mirrors change based on your earlier trial choices:
- Accepted both truths in Trial 1 → the Veil's mirror shows unity
- Preserved painful memories in Trial 2 → Memory's mirror shows strength
- Helped all spirits in Trial 3 → Burden's mirror shows gratitude
- Answered decisively → Conviction's mirror shows resolve
Hidden Interaction: Walk behind the mirrors after making your choice. There is a cracked mirror that shows your own reflection, Myrin's face for the first time in the game. No dialogue, no prompt. Just a moment of recognition.
Trial 5: The Trial of the Storm
Keeper: There is no Keeper here. The domain is the Veilstorm itself, a chaotic maelstrom of shattered reality fragments, floating ruins, and howling energy. The storm speaks.
The Test: Navigate through the storm toward the Codex at the center. The storm throws obstacles, illusions, and questions at you. Unlike the other trials, this one has a physical component. You must keep moving forward.
The Storm's Questions (in order):
-
"Do you still believe the Codex is worth saving?"
- Yes → the storm rages harder, trying to change your mind
- No → the storm calms slightly
- I don't know → the storm pauses, then asks "Then why are you here?"
-
"What if the Codex wants to end?": your response determines whether you noticed the environmental storytelling about the Codex's fatigue
-
"What if you are the one who breaks it?"
Obstacles and Hazards: The storm path has three sections:
- Fragments: Floating debris you must dodge. Getting hit does no damage but disorients the screen momentarily
- Illusions: Images of the Keepers appear and try to turn you back. Walk through them, they are not real
- Echoes: Voices of previous chosen ones who failed to reach the Codex. Their words hint at the endings
Hidden Interaction: Near the end of the storm path, slightly off the main route, there is a calm pocket, a small circle where the storm does not reach. Inside is a single white flower growing from a crack in the ground. Interact with it for a journal entry: "Even here, something grows."
Step-by-Step Strategy: Actionable Sequences
Sequence 1: Optimal Trial 1 Run (Both Truths + Hidden Symbol)
- Enter the mist. Walk toward every silhouette that stays visible.
- Speak with the Keeper of the Veil. Choose "I accept both as true."
- Ask the follow-up question about perception, only available after that choice.
- Before leaving, interact with the staying silhouettes to see all three world-flashes.
- Return to the starting area. Find the glowing symbol on the ground. Interact.
- Check the journal. You should have two entries from this domain.
Sequence 2: Full Trial 2 Tablet Collection
- Enter the library of ruins. Do not speak to the Keeper yet.
- Sweep the entire domain for tablets. There are seven, one is hidden behind a collapsed pillar near the domain's rear edge.
- Read all seven in order before making any choices.
- Make your three memory dilemma choices, any combination.
- Interact with the cracked pillar behind the Keeper for the previous chosen one vision.
- Journal check: you should have "The First Keeper's Regret" plus the standard trial record.
Sequence 3: Max-Empathy Trial 3
- Find all three spirits. Talk to each fully before helping anyone.
- Help the Lost Child by guiding them to the safe spot.
- Acknowledge the Betrayed Soldier's story fully. Choose the option that validates their pain.
- Preserve the Forgotten Artist's piece. This gives you the fragment token.
- Answer the Keeper's final question with "Both."
- Return to each spirit location. Interact with all three tokens and markers.
- Journal check: "To carry another's burden..." entry unlocked.
Sequence 4: Trial 4 Hidden Path Discovery
- In Trials 1-3, always choose the "ask why" or "question the premise" dialogue options where they exist.
- In Trial 4, examine all four mirrors first.
- Ask the Keeper "why must one be sacrificed at all?"
- Look for the hidden fifth option. If it appears, take "There is nothing to sacrifice."
- Walk behind the mirrors afterward. Interact with the cracked mirror.
- This sets the flag that unlocks the "I don't know" final choice variant.
Sequence 5: Storm Navigation + Calm Pocket
- Enter the storm. Keep moving. Standing still lets the fragments converge.
- Answer the first question "I don't know" to get the extra dialogue.
- Walk through all Keeper illusions. They cannot hurt you.
- Listen to all three echo voices before proceeding.
- Near the end, veer off the main path to find the calm pocket. Interact with the white flower.
- Continue to the Codex for the final choice.
Sequence 6: The Preservationist Ending Run (45 minutes)
- Follow the Run 1 table in Progression Strategy below.
- Keep a checkpoint save before the final choice.
- After the Sacrifice ending, reload the checkpoint.
- Choose New Beginning instead. See the contrast without replaying the trials.
- Compare the two journal flags.
Sequence 7: Completionist Journal Sweep (90 minutes)
- Reload Trial 1 checkpoint → "Neither" path → starting area symbol.
- Reload Trial 2 → alternate memory choices → pillar vision.
- Reload Trial 3 → refuse each spirit once → triple interaction.
- Reload Trial 4 → each sacrifice option → behind mirrors.
- Reload Trial 5 → all three storm answers → calm pocket.
- Confirm all 14 hidden journal entries are present.
Progression Strategy: How to Structure Your Playthroughs
The Two-Run Blueprint
Because the game tracks dominant flags rather than individual choices, the cleanest way to see everything is two full runs with opposite philosophies, plus targeted checkpoint reloads.
Run 1, The Preservationist (Sacrifice ending):
| Trial | Recommended Approach | Flag Effect |
|---|---|---|
| Veil | Accept both truths | Contemplative tone, unlocks perception dialogue |
| Memory | Preserve painful truths | Strong preservation thread |
| Burden | Help all spirits, answer "Because I felt their pain" | Max empathy, artist's fragment token |
| Conviction | Sacrifice the Keeper of the Storm via the hidden path | Lowest-cost sacrifice |
| Storm | Answer "yes," the Codex is worth saving | Confirms preservation dominance |
| Final Choice | Sacrifice | Ending A |
Run 2, The Liberationist (New Beginning ending):
| Trial | Recommended Approach | Flag Effect |
|---|---|---|
| Veil | Challenge, neither is true | Doubt entry, Codex creation lore |
| Memory | Forget the painful, let go | Strong liberation thread |
| Burden | Help selectively, answer honestly about mixed motives | Nuanced empathy, different closing |
| Conviction | Sacrifice the Keeper of Memory | The past holds you back framing |
| Storm | Answer "no," it is time to let go | Confirms liberation dominance |
| Final Choice | New Beginning | Ending B |
Time: Run 1 about 45 minutes reading everything. Run 2 about 25 minutes with known paths.
Note on Trial 4: The standard menu offers Veil, Memory, Burden, and Conviction. There is a hidden fifth option that appears only if you have been asking questions rather than answering them. If you choose "Ask why you must choose at all" in each trial, the Conviction domain eventually offers a hidden path: "There is nothing to sacrifice." Taking it sets a unique flag that changes the final confrontation's opening line.
The Final Choice: Complete Breakdown
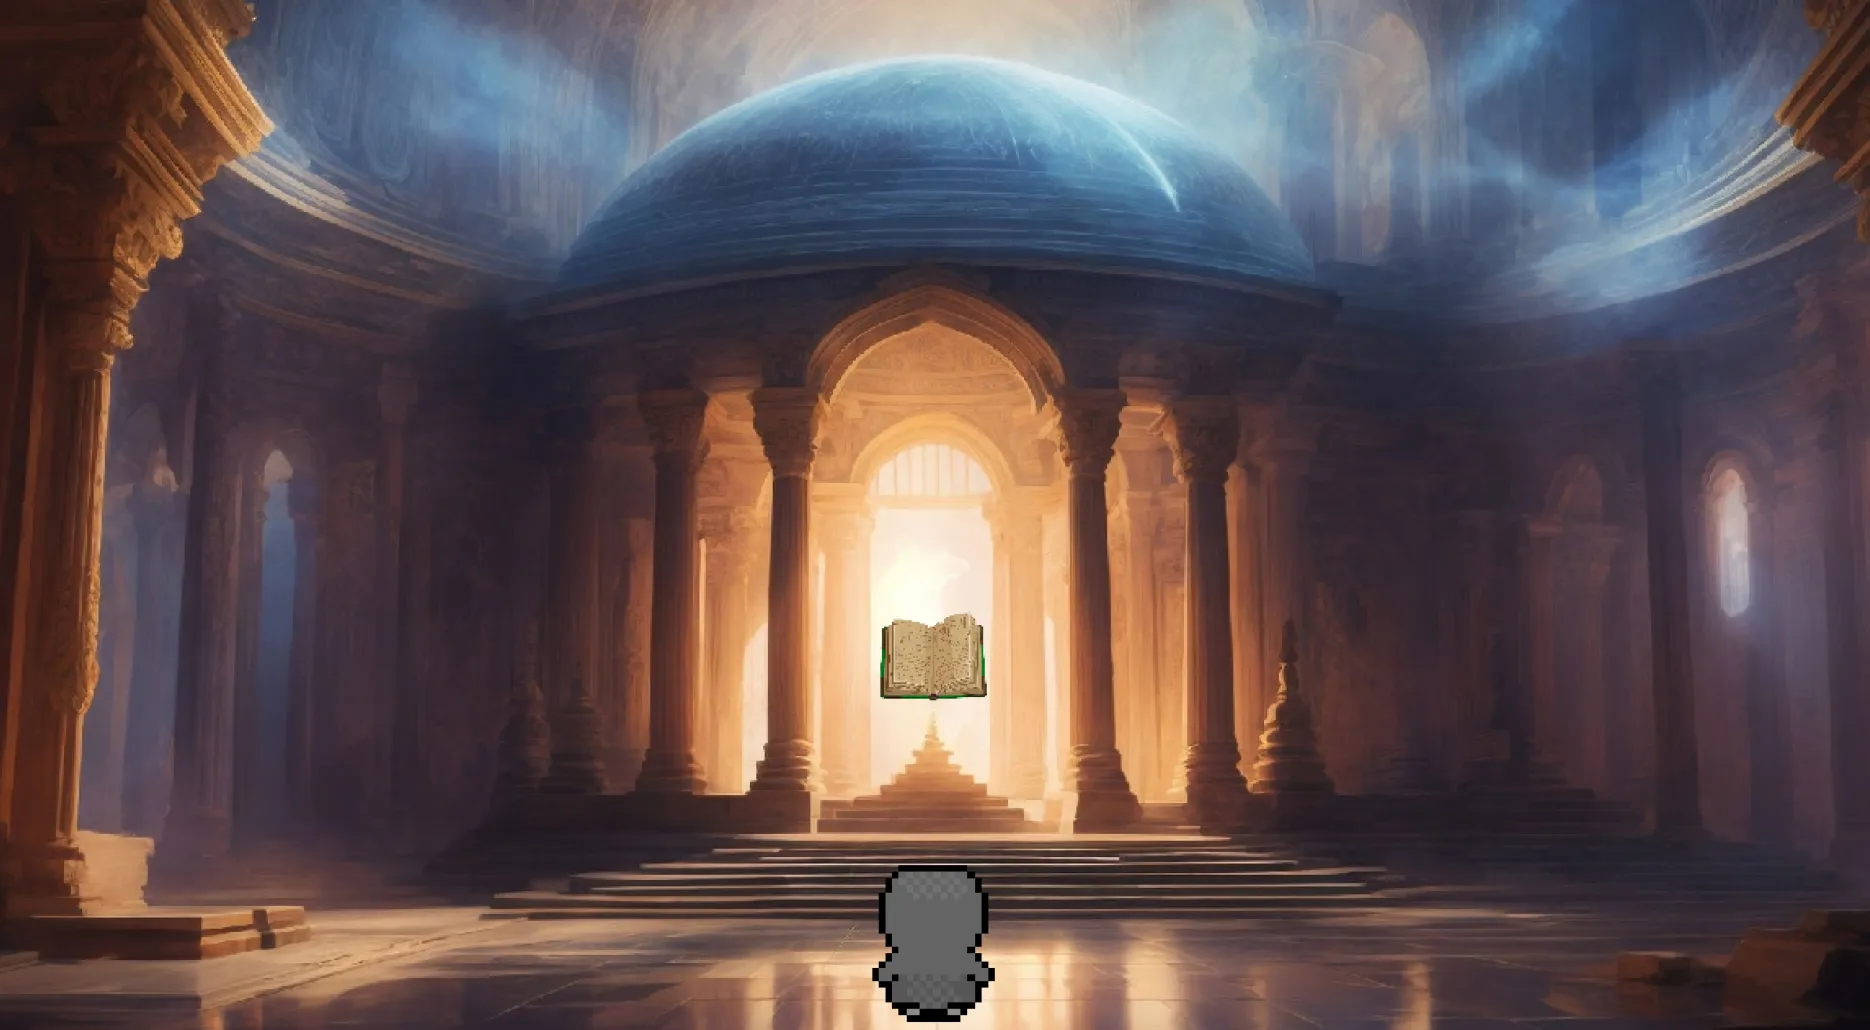
After all five trials, you stand before the Codex. It pulses weakly. The Keepers gather behind you, watching. The storm rages at the edges of existence. Two options appear.
Ending A: Sacrifice
How to unlock: Answer "yes" to the storm's question about the Codex being worth saving. Make mostly preservation-oriented choices throughout. But the choice is ultimately free. You can make any choices and then pick Sacrifice at the end.
What happens: Myrin places a hand on the Codex. Their body dissolves into light that pours into the artifact. The Codex stabilizes. The Veilstorm recedes. The Keepers bow their heads. The world continues, unchanged, unaware that anyone sacrificed anything. The final shot: the Codex, glowing steadily, alone in an empty chamber.
Thematic meaning: Order preserved. Stability maintained. But at the cost of individual existence. Myrin becomes part of the system they sought to save.
Journal flag: "The Codex endures. I do not."
Ending B: New Beginning
How to unlock: Answer "no" or "I don't know" to the storm. Make change-oriented choices. Again, the choice is free.
What happens: Myrin pulls their hand back. The Codex shatters. The Veilstorm sweeps through, consuming the Keepers, the domains, everything. Myrin stands alone in a white void. A single seed falls from above. The final shot: the seed planting itself in the void, a green sprout emerging.
Thematic meaning: Change embraced. The old world ends, but something new begins. Myrin survives, carrying the weight of everything lost.
Journal flag: "The Codex is gone. I am free. I am terrified."
Contextual Differences
The ending cutscenes have variations based on your trial choices:
- Trial of the Veil outcomes affect the mist quality: whether the ending scene is shrouded or clear
- Trial of Memory outcomes affect the Keepers' final words: they either thank you or accuse you
- Trial of Burden outcomes affect whether the spirits appear in the final scene: they help you or abandon you
- Trial of Conviction outcomes affect the Codex's appearance: warm and inviting or cold and repelling
- Trial of the Storm outcomes affect Myrin's final expression: determined, regretful, or peaceful
The Hidden "Neither" Variant
If you unlocked the hidden fifth option in Trial 4 (the "nothing to sacrifice" path), the final choice screen gains a third, faintly visible option that flickers in and out: "I don't know." Selecting it plays a special version of the ending where Myrin hesitates. The Codex cracks, the storm pauses, and the screen fades to white before either ending's cutscene plays. This is the game's closest thing to a secret ending, and it only unlocks the journal entry "The Architect's Question."
Lore Compendium: Every Hidden Detail
The Original Architect
The Codex was created by a being simply called "the Architect." This entity is never named, never shown, and appears only in the lore tablets. The Architect warned the Keepers that the Codex would eventually fail, that no system is eternal. The Keepers chose to believe they could maintain it indefinitely. That hubris is the root of the game's conflict.
The Previous Chosen Ones
The cracked pillar in the Trial of Memory shows glimpses of others who walked this path. None reached the end. The implication: the trials become harder over time as the Codex weakens. Myrin may be the last chance.
The Keepers' True Nature
Each Keeper is not a person but an embodiment of a concept the Codex requires to function:
- Veil = the boundary between known and unknown
- Memory = the record of what has happened
- Burden = the cost of existence
- Conviction = the will to continue
- The Storm = not a Keeper, but the absence of one, the force that exists outside the Codex's order
The White Flower
The flower in the calm pocket of the storm is the only organic life in the entire game that is not a spirit or Keeper. Its presence in the domain of pure chaos suggests life finds a way even in impossible conditions. It is the game's most direct symbol of the New Beginning ending.
The Seven Tablets of Memory
The seven stone tablets in the Trial of Memory spell out, in order, a compressed history of the Codex: its creation, its golden age, the first cracks, the Architect's warning, the Keepers' decision, the first failed chosen one, and a final line that reads "The Codex does not remember what it cannot hold." That last line is the key to the game's central question. The Codex itself is subject to the limits it enforces.
Advanced Tips: What Experienced Players Know
- The journal is a save-file audit. Every hidden entry you unlock is proof of a specific choice combination. If you are missing one, work backward from what you chose.
- Dialogue choices are not all equal. Flavor lines that advance conversation do not set flags. The flagged choices are usually the ones that restate a position, "I accept," "I refuse," "I don't know," rather than ask a question.
- Asking questions is a strategy. The "ask why" options in Trials 1-3 unlock the hidden path in Trial 4 and the "I don't know" ending variant. A run where you ask questions is a different game than a run where you answer them.
- The artist's fragment matters. The token from the Forgotten Artist in Trial 3 appears in the final scene. If you preserved it, the ending cutscene shows Myrin holding it. It is the only physical object that carries across the entire game.
- The mist silhouettes are choice-sensitive. Which silhouettes stay depends on your Trial 1 answers. A "Neither" run shows different silhouettes than an "accept both" run.
- Catalog the ending variations. There are 2 base endings times 5 variable elements, up to 32 visual and textual combinations, though the game realistically produces 8 to 10 distinct feels. Each is a different emotional payoff.
- No wrong answers, but there are locked doors. The game never fails you, but certain journal entries are mutually exclusive across runs. "The First Keeper's Regret" requires reading all seven tablets, possible in any single run. "The Architect's Question" requires the hidden path, which requires question-heavy choices. Plan runs accordingly.
Developer Background: Who Is EmptyPotatoSack?
The credit list is one person. EmptyPotatoSack builds the game solo in Godot and publishes it free on itch.io, where the profile holds exactly two projects: this game and a work-in-progress jam entry called BrainlessGameJam.wip. On that jam page the developer lays out the plan: nail the four core principles of game development (code, story, art, music), and fight what they call the biggest hurdle of any project, scope creep.
That sentence explains a lot about this game's shape. It is small on purpose. Five trial domains, one mechanic family (dialogue choices feeding hidden flags), two endings, no combat system to build, no licensed assets. The scope discipline shows up in the game as density: every screen has interactions, and nothing exists just to fill space.
Two more facts worth knowing before you play:
- The page carries a "No generative AI was used" badge. The writing, art, and code are human-made. For a text-adjacent narrative game that is a real promise: the journal entries, the Keeper dialogue, and the lore tablets came from a person with one coherent plan, not a patchwork of generated text.
- The project is listed as "In development." The current build is complete and playable through both endings, but a solo hobby developer can add or change content with any upload. The trial walkthroughs and hidden-entry locations in this guide describe the build live as of September 2026. If a future update reshuffles the trials, the flag logic here still holds; the flag system is the game's spine.
For a free browser game, the polish level is the surprise. The domains have distinct color identities, the Keeper designs read clearly, and the interface stays out of the way. Judge it as what it is: a hobby-scale project with professional instincts.
FAQ / Common Mistakes
Is there any combat? No. Zero combat, zero fail states, no wrong answers. The game is a narrative experience.
How long is one playthrough? 30 to 60 minutes depending on reading speed and exploration thoroughness.
Can I replay specific trials? The game saves checkpoints at each trial start. You can reload from any checkpoint after completing it once.
Does the game work on Mac or Linux? The browser version works on any platform with WebGL2 support. The downloadable build is Windows-only.
Is this a horror game? It has atmospheric tension and some dark themes, but no jumpscares, gore, or traditional horror elements.
Are there multiple endings beyond the two main ones? Two distinct endings with multiple contextual variants based on your choices. There is also a hidden "I don't know" variant accessible only if you unlock the hidden fifth option in Trial 4.
I skipped the opening text and now I'm confused. What did I miss? The prologue establishes that the Codex is reality itself and the Veilstorm is entropy. You can reopen the journal for a summarized version, but the emotional weight of the ending depends on internalizing this early.
I finished the game and only got one journal entry. Did I break it? No. Most hidden entries require specific choices or return visits. The completionist sweep in this guide will unlock the rest.
Will the game receive updates? The developer lists the status as "In development." The current build is complete and fully playable. Future updates are likely polish and additional content.
Is the free browser version the full game? Yes. The browser build (WebGL2) is the full game with both endings. The Windows download is the same content in a standalone executable.
I am playing in the browser and the game is slow. What should I do? Close background tabs and make sure hardware acceleration is on in your browser. The WebGL2 build is light, but older integrated GPUs benefit from a fresh browser session.
Where do I get the Windows version? On the itch.io page, below the browser player, there is a download section. The Windows executable is about 225 MB and does not require installation.
Playing in the Browser: Performance and Your Save
Most players will meet this game through the itch.io browser player, so a few practical notes:
Performance. The build targets WebGL2. On any laptop from the last five years it runs full speed, but two things trip people up:
- Hardware acceleration must be on. In Chrome/Edge: Settings → System → "Use graphics acceleration when available." In Firefox: Settings → General → Performance. With it off, the canvas falls back to software rendering and movement stutters in the Trial 5 storm.
- Give the page focus. If keys stop responding, click once inside the game canvas. Browser games lose keyboard focus to the page frame, and WASD silently dies while the page still shows the game.
How saves actually work. The browser build stores checkpoints in the page's local storage, keyed to the site. Two consequences:
- Do not clear site data mid-run. Clearing cookies and site data wipes your checkpoints. Finish a run first.
- Private/incognito windows do not keep saves. Play in a normal window if you plan to use the checkpoint reload strategy.
- The Windows build is the safe option for long runs. The 225 MB executable stores its data locally with none of the browser fragility. If you are doing the full completionist sweep across multiple sessions, download it.
Aspect ratio and window size. The 2D top-down view scales to the canvas. If text looks small, zoom the page with Ctrl/Cmd + "+" before entering a domain; the game re-renders crisply at browser zoom levels.
Quick Reference Card
Everything essential on one screen. Screenshot this.
| Item | Value |
|---|---|
| Price | Free |
| Platform | Browser (WebGL2) + Windows download (225 MB) |
| Engine | Godot, no generative AI |
| Move | WASD / Arrow Keys |
| Interact | E / Space |
| Journal | Tab (Backspace also pauses) |
| Dialogue confirm fallback | Space (when E does nothing) |
| Run length | 30-60 min first run |
| Full completion | 2-4 hours |
| Trials | Veil → Memory → Burden → Conviction → Storm |
| Endings | Sacrifice / New Beginning + hidden "I don't know" variant |
| Hidden journal entries | 14 total |
| Flag types | Preservation, Liberation, Empathy, Conviction |
| The one rule | Ask questions in Trials 1-3 to unlock Trial 4's hidden path |
| Missable token | Forgotten Artist's fragment (Trial 3, carries to the ending) |
| Rarest lore | "The Architect's Question" (needs question-heavy run) |
| Best run plan | Blind run 1 → opposite-philosophy run 2 → checkpoint sweep |
The five-step skeleton of any good run:
- Talk to everything before choosing anything.
- Ask "why" whenever the option exists.
- Check the journal after each trial.
- Revisit old locations after new trials.
- Save nothing for later; the checkpoint system already does it for you.
Last reviewed by Game How To Editorial. We play each game, verify controls against official sources, and update guides when game mechanics change.