Daily Pick
One deeply researched guide worth reading today.
A practical route through the systems that matter most, written to help new players make confident decisions quickly.
Overview
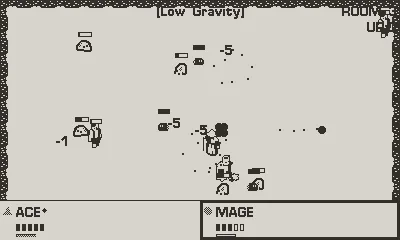
Dungeon Bounce is a physics-based dungeon crawler built exclusively for the Playdate handheld. It blends pinball mechanics with hero-party management into a tight 6-room gauntlet. You do not walk your heroes through the dungeon. You launch them. Hold B to slow time, crank to aim, release to fire your hero like a bullet across the room. They bounce off walls, smash into enemies, and ricochet into more enemies. Every surface is a weapon.
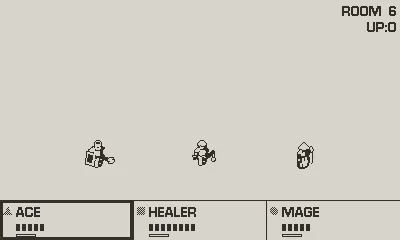
Three heroes, each with a unique shape, role, and charged ability. A relic system between rooms. No checkpoints, no continues. One run, six rooms, full clear or bust. A full run takes 10-20 minutes.
Platform: Playdate (sideload .pdx via USB or wirelessly) Price: Name your own price (free accepted) File size: 130 kB Developer: matheus (matheusnicolas), solo developer behind Mechar Software Status: Prototype (core loop complete, fully playable)
Target audience: Playdate owners who like arcade skill games, pinball fans, roguelite fans who want a bite-sized session, and anyone who enjoys games that demand genuine aim precision. The black-and-white 400x240 screen and the crank input make it a uniquely handheld experience.
Difficulty: High skill ceiling despite simple controls. The first clear usually takes 3-5 attempts. Mastery (sub-8 minute clears) takes deliberate practice. The difficulty curve is spiky: Rooms 1-3 teach, Room 4 punishes, Room 5 brutalizes, Room 6 demands a complete game.
Getting Started: Your First Run
Controls: Every Input Dissected
| Input | Action | Advanced Notes |
|---|---|---|
| Hold B | Enter precision aiming mode | Time slows to ~30% speed. The crank becomes your aiming tool. Release B to launch. |
| Crank (while holding B) | Aim launch direction | Full 360-degree analog control. Small movements (< 5 degrees) matter at tight angles. |
| Release B | Launch current hero | Hero travels in the aimed direction until hitting a wall or enemy. |
| D-Pad Left / Right | Cycle heroes (Ace ↔ Healer ↔ Mage) | No wrap-around, you must scroll through. Order is fixed: Ace → Healer → Mage → Ace. |
| A | Activate charged ability | Only works if the ability gauge is full (5 hits). Ability fires immediately at the hero's current position. |
The precision aim system is the heart of the game. Holding B slows everything down: enemies, projectiles, cooldown timers. You have unlimited time to line up your shot. There is no penalty for holding B and waiting. Take every shot methodically.
Crank technique: The crank gives analog precision that digital buttons cannot match. For long-distance shots across the room, full crank rotations map to about 180 degrees of aim. For micro-adjustments, use the crank's fine-motor region: thumb-and-index-finger grip, small wrist movements. Rest the Playdate on a table or your thigh for stability; a floating crank hand drifts mid-aim and ruins tight shots.
The First 10 Minutes: What to Expect
- Title screen → immediate run. No menu depth, no difficulty selection, no tutorial mode. You are dropped into Room 1 with all three heroes.
- Room 1 is your de facto tutorial. Three grunts, open square room. This is where you learn the launch loop: hold B, aim, release, watch the bounce.
- Your first death will happen in Room 3 or 4. Do not be discouraged. The run is 10-20 minutes, so failure is cheap.
- Relics appear after every room. You pick one of two. The choice is permanent for the run.
Beginner Mistakes to Avoid
| Mistake | Why It Kills Your Run | Fix |
|---|---|---|
| Hero stacking | Multiple heroes on the same spot. One enemy attack hits all of them. | Spread them out. Launch to different quadrants. |
| Ignoring the Healer | Healer sits idle while Ace and Mage take damage. No recovery available. | Cycle Healer in every rotation even if nobody needs healing. Keeps her charging. |
| Spamming one hero | Other heroes are useless. Total DPS drops by 66%. | Set a mental timer: switch every 2 seconds. |
| Using abilities immediately | You might waste Mage Burst on 2 enemies when 5 are about to spawn. | Wait. Let enemies group. Use abilities at peak value. |
| Not using abilities at all | Leftover charges at room-clear are lost forever. | If a room is almost clear and a hero has a charged ability, use it. |
| Bad heal positioning | Healer heals herself but misses Ace and Mage standing 2 pixels outside the radius. | Launch Healer between the damaged heroes before pressing A. |
| Panic launching | Holding B is free. Taking 10 seconds to aim is fine. | Breathe. Slow is smooth. Smooth is fast. |
| Ignoring the ~2s cooldown | Launching a hero before their cooldown ends wastes the input. | Watch the cooldown indicator. Queue your next hero's launch during downtime. |
The Three Heroes: Complete Statistical Breakdown
Ace (Triangle, Striker)
| Stat | Value | Analysis |
|---|---|---|
| Shape | Triangle | Ricochets at unpredictable angles off walls (triangle geometry creates irregular bounce patterns) |
| Role | Single-target combo damage | Best for finishing wounded enemies and locking down threats |
| HP | 5 | Fragile. Two hits from most enemies and he is down. |
| Speed | Fast | Short cooldown (~1.5s effective), quick repositioning |
| Ability | Duel: Rush nearest enemy, lock into 1-on-1 combo: 3 damage × 3 hits = 9 total | Auto-targets. Cannot miss. Interrupts enemy attack animations. |
Ace's triangle shape is both a strength and a weakness. Triangles produce unpredictable bounce angles off flat walls. A 45-degree entry might exit at 60 degrees. This makes him harder to aim precisely at long range but gives him better coverage when fired into a crowd. His fast speed means you can launch him, switch immediately to another hero, and Ace will have completed his trajectory and be ready again by the time your second hero lands.
Duel ability analysis: 9 damage guaranteed to the nearest enemy. This kills most basic enemies in one use. Use it on:
- Enemies about to attack (Duel interrupts them mid-windup)
- The last enemy in a room (guaranteed kill, no aiming needed)
- High-priority targets behind obstacles (auto-target ignores walls)
Ace's hidden strength, the interrupt. Duel's animation cancels enemy windups. Against Chargers and the Boss, a well-timed Duel is a free defensive tool, not just damage.
Healer (Square, Support)
| Stat | Value | Analysis |
|---|---|---|
| Shape | Square | Most predictable bounces. 90-degree reflections off walls. Easiest to aim precisely. |
| Role | Team sustain | Only source of HP recovery in the game |
| HP | 8 | Tankiest hero. Can survive 3-4 hits from basic enemies. |
| Speed | Moderate | ~2s cooldown. Slower than Ace and Mage. |
| Ability | Heal: Restore 3 HP to all nearby heroes (including herself) | Short-radius AoE. Position matters critically. |
Healer is the most important hero in your party. Without her, you cannot recover HP. If she dies in rooms 4-6, the run is effectively over. You will bleed out before reaching the final room.
Heal positioning trick: The heal radius is about one-third of the room width. To maximize coverage, launch Healer to the center of the room before pressing A. If Ace and Mage are on opposite sides, launch Healer to one side first, heal that side, then launch her to the other side on the next rotation.
Square geometry advantage: Bounces off walls at perfect 90-degree angles. You can predict exactly where she will go. Use this for surgical healing: aim at a wall behind a damaged hero so she ricochets directly onto them.
The Healer-first rule for new players: Until you have 5+ clears, always open a room by launching Healer to the center. This guarantees she is positioned to heal whoever takes the first hit, and her square bounces are the easiest to land.
Mage (Circle, Area Damage)
| Stat | Value | Analysis |
|---|---|---|
| Shape | Circle | Theoretically perfect rolling. In practice, circle + wall = slightly unpredictable spin-off. |
| Role | AoE burst damage | Room-clearing potential unmatched |
| HP | 5 | Same as Ace. Fragile. Protect her. |
| Speed | Fast | Same cooldown as Ace (~1.5s). |
| Ability | Mage Burst: Fire 8 magic orbs in 8 cardinal/intercardinal directions, each dealing 5 damage, bouncing off walls | 40 potential total damage. Highest single-ability damage in the game. |
Mage Burst is the run-defining ability. In a room with 5+ enemies, a well-positioned Burst can clear half the room instantly. The 8 orbs fire in N, NE, E, SE, S, SW, W, NW directions. Each orb travels until it hits a wall, then ricochets. If an orb hits an enemy, it deals 5 damage and continues through (no damage cap per orb).
Optimal Burst positioning: Launch Mage to the geometric center of the room before pressing A. This gives maximum coverage. In rectangular rooms, the center is roughly the midpoint of the floor. In irregular rooms, look for the spot that gives the most open sightlines in all directions.
Burst economy: Because orbs pass through enemies, a Burst fired into a dense cluster deals 5 damage per enemy per orb. The realistic ceiling against 5 grouped enemies is far above 40 total damage. Never waste a Burst on a single straggler unless it is the last enemy.
Bounce Physics: The Complete Guide
Wall Reflection Mechanics
Every hero, regardless of shape, reflects off walls using the law of reflection: angle of incidence = angle of reflection. However, shape modifies the exit angle slightly:
| Shape | Entry Angle | Exit Angle | Practical Effect |
|---|---|---|---|
| Square | 45° | ~45° | Most predictable. Use for surgical shots. |
| Triangle | 45° | ~50-60° | Widens on each bounce. Good for coverage. |
| Circle | 45° | ~40-50° | Slight randomness. Use when spread is desired. |
Multi-Bounce Chains
The real power comes from chaining bounces. A direct hit on an enemy deals 5 damage. But a single launch that bounces off 3 walls and hits 2 enemies deals 5 damage to each enemy and charges the ability gauge by 2 hits, without using any extra cooldown.
Three-wall corner shot (most reliable multi-bounce):
- Position your hero on one side of the room
- Aim at the corner wall opposite your target cluster
- The hero hits that corner wall, bounces to the adjacent wall, bounces again into the cluster
- Three surface contacts = three chances to redirect into enemies
Pinball setup (advanced):
- Identify a narrow corridor or channel between obstacles
- Aim directly into the channel at a shallow angle (~20 degrees)
- The hero bounces rapidly between the two walls (like a pinball)
- Each wall bounce counts as a surface contact. If enemies are in the channel, they take multiple hits.
Wall Jump Cancel (WJC)
A little-known tech: if you launch a hero and they hit a wall at nearly a 90-degree angle, they stop bouncing and drop straight down. This is usually bad, it wastes the launch. But you can use it deliberately to position a hero exactly where you need them without the ricochet randomness. Aim directly at the wall next to your target position. The hero hits the wall, drops, and is now where you need them.
The 45-Degree Rule
The single most useful aiming heuristic: a 45-degree entry angle gives you the widest predictable spread. Any shallower and the hero skims the wall; any steeper and you approach the WJC dead-drop. When in doubt, aim at 45 degrees toward where you want the hero to end up.
Enemy Types and Counters
Basic Grunt: Stationary or slow-moving. 3 HP. Dies to one direct hit from any hero. No threat alone, dangerous in groups of 5+. Counter: Any hero. Mage Burst clears groups of grunts instantly.
Charger: Moves quickly toward the nearest hero. 5 HP. Deals 2 damage on contact with your heroes (not on launching; launching INTO a charger damages IT, not you). Counter: Ace's Duel interrupts charge animations. Launch Ace at them preemptively.
Turret: Stationary, fires projectiles in a fixed pattern. 8 HP. Projectiles deal 1 damage to your launched heroes (not to their HP; hero HP only drops when enemies physically contact them while they are stationary on the floor). Counter: Healer (high HP tanks the projectiles while bouncing). Destroy the turret from behind where its projectiles cannot reach.
Shielder: Has a frontal shield that absorbs one hit. 5 HP + shield. Shield regenerates after 3 seconds. Counter: Bounce around the shield. Aim at a wall behind the Shielder so the ricochet hits them from the rear. Or use Mage Burst, orbs hit from all angles.
Boss: Appears in Room 6. ~20 HP. Has a rotating damage aura that hits nearby heroes. Spawns minions every 10 seconds. Counter: Keep your party spread out. Use Mage Burst on minions immediately. Use Ace's Duel on the Boss to interrupt its attack cycles. Keep Healer central for rapid healing.
Enemy Aggro Rules
- Enemies target the hero that has been stationary on the floor the longest.
- Launching a hero makes them untargetable while in flight.
- This means: the safest hero to leave on the floor is the one with the most HP (Healer), and the riskiest is whoever landed last.
Progression Strategy: How to Improve Run Over Run
The Skill Ladder
| Stage | Milestone | How to Reach It |
|---|---|---|
| 1 | Clear Room 3 consistently | Learn the launch loop and hero rotation |
| 2 | Clear Room 5 | Master corner shots and enemy priority |
| 3 | First full clear | Combine everything + Boss phase management |
| 4 | Sub-10 minute clear | Learn when to skip perfect positioning |
| 5 | Sub-8 minute clear | Speedrun discipline (see Speedrun section) |
| 6 | No-death clear | Flawless Healer management and ability timing |
What to Practice in Each Room
- Room 1: Launch loop. Do not move on until you can hit 5 grunts in a row without a miss.
- Room 2: Corner shots around pillars.
- Room 3: Ability timing (when to Burst vs. save).
- Room 4: Tight-corridor aiming and WJC positioning.
- Room 5: Priority targeting under pressure (Turrets first).
- Room 6: Boss phase transitions and minion wave management.
Relic Priority
Relics appear between rooms after clearing. You choose one from a selection of two.
S-Tier (always take)
| Relic | Effect | Why |
|---|---|---|
| HP Crystal | +2 HP to all heroes | Every hero gets tankier. Healer goes from 8 to 10 HP, she can survive 5 hits instead of 4. |
| Blessing of Restoration | +1 HP healed per ability use | Heal goes from 3 to 4 HP. Over a 6-room run, this adds 10-15 effective HP. |
A-Tier (take if S is not available)
| Relic | Effect | Why |
|---|---|---|
| Quick Hands | -15% cooldown | Faster cycling = more launches = more damage. |
| Arcane Amplifier | +2 damage per orb (Mage Burst only) | Each orb goes from 5 to 7 damage. Total Burst potential: 56 damage instead of 40. |
B-Tier (situational)
| Relic | Effect | When to take |
|---|---|---|
| Sharpshooter's Mark | +2 damage on direct hits | Only useful if you are consistently landing direct hits. Take if your aim is good. |
| Speed Boots | +10% launch speed | Faster hero travel = harder to aim, but shorter time-in-flight. High risk, medium reward. |
C-Tier (avoid if possible)
| Relic | Effect | Why |
|---|---|---|
| Ricochet Rune | +1 extra bounce on wall hit | Sounds good, but the extra bounce often sends heroes into empty corners. Unpredictable. |
| Fortune's Favor | Random effect every room | Could double your damage, could do nothing. Too inconsistent for a 6-room gauntlet. |
Room-by-Room Strategy Guide
Room 1: The Introduction
Layout: Open square room. 3 Grunts. Goal: Learn the controls. Strategy: Do not rush. Spend this entire room practicing:
- Hold B, crank-aim, release. Repeat.
- Cycle through all three heroes.
- Land 5 hits with each hero to see their ability animations. Target: Clear in 30-45 seconds. Charge all three abilities before finishing.
Room 2: First Pressure
Layout: Rectangular room with two pillars in the center. 4 Grunts + 1 Charger. Goal: Practice bounce shots around obstacles. Strategy: The pillars block direct shots. Use corner bounces to curve around them. Open with Mage from the side: launch toward the pillar, the ricochet carries him into the cluster behind it. Target: Use each hero's ability at least once.
Room 3: Mid-Game Threshold
Layout: L-shaped room. 3 Grunts + 2 Turrets + 1 Charger. Goal: Resource management. Strategy: Kill the Turrets first. They are stationary and cannot dodge. Healer's square bounces make short work of them from across the room. Then clean the Charger (Ace Duel). Grunts last. Watch for: The Charger will aggro on whichever hero is on the floor longest. Keep switching. Target: Exit with all heroes above 50% HP.
Room 4: The Difficulty Spike
Layout: Narrow vertical corridor. 3 Shielders + 3 Grunts + 1 Charger. Goal: Positioning and angle management. Strategy: This is the first room that punishes bad aim. The corridor is tight, easy to miss and waste launches. Use wall bounces to hit Shielders from behind. Heal after every significant engagement. If you enter this room with Healer's ability charged, use it immediately. The trap: Players panic in tight corridors and spam launches. Slow down. Hold B, take your time aiming. Target: No hero deaths.
Room 5: The Gauntlet
Layout: Large open room with obstacles. 4 TURRETS (all sides) + 2 Chargers + 4 Grunts. Goal: Prioritization and movement management. Strategy: This is the hardest non-boss room. Turrets create overlapping fire zones. The Chargers will chase your heroes. The grunts swarm.
Step-by-step:
- Open with Mage Burst. Launch to center, press A. The orbs will hit most of the grunts and may take out a turret.
- Immediately switch to Ace. Use Duel on the nearest Charger to interrupt it.
- Launch Healer toward the area with the most damaged heroes. Heal.
- Cycle back to Mage. By now, abilities should be recharged or close to it.
- Focus fire on Turrets one at a time. They cannot chase you, so they are predictable targets.
- Clean up remaining enemies.
Target: Clear within 60 seconds. Accept that one hero may die, but not Healer.
Room 6: Boss Fight
Layout: Circular arena. Boss in center. Minions spawn from edges. Goal: Survival and sustained damage. Strategy: The Boss has ~20 HP and a rotating damage aura. Minions spawn every 10 seconds from random edges. The fight is a war of attrition.
Phase 1 (20-12 HP): Focus on minions. Use Mage Burst as soon as they spawn. Do not attack the Boss directly, it is not worth the HP loss from the aura. Kill 3 waves of minions first.
Phase 2 (12-5 HP): The Boss's aura shrinks. You can now get closer. Launch Ace at the Boss in short bursts: aim, launch, immediately switch. Use Duel when charged. Heal after every 2-3 exchanges.
Phase 3 (5-0 HP): The Boss spawns minions faster (every 6 seconds) and its aura pulses. Do not stop moving. Keep all three heroes in constant rotation. Save Mage Burst for minion waves. Use Healer's ability on cooldown.
Boss DPS math: Ace's Duel (9 damage) + Mage Burst (40 potential) + direct hits (5 each) means the theoretical kill window is under 60 seconds if you keep abilities cycling. The realistic kill takes 2-3 minutes because you must interrupt for minion waves.
Ability Charge Optimization
| Hero | Hits to charge | Potential Damage | Best Use Window |
|---|---|---|---|
| Ace | 5 | 9 damage (single target, guaranteed) | Room 4+ when an enemy is above 50% HP |
| Healer | 5 | 3-12 HP restored (scales with heroes in radius) | After any engagement where total party HP is below 80% |
| Mage | 5 | 40 potential damage (spread) | Room opening or when 3+ enemies are alive |
The 40-damage ceiling: Mage Burst's 40 potential damage is the single highest value in the game. A well-timed Burst at the start of Room 4, 5, or 6 can trivialize the encounter. Never enter the boss room without Mage's ability charged.
Healer opportunity cost: Using Heal when everyone is at full HP wastes the charge. But waiting too long risks a hero dying. Rule of thumb: if any hero is below 50% HP, heal immediately. If everyone is above 80%, save it.
Ability charge carry-over: Charges do NOT reset between rooms. If you exit a room with a charged ability, it carries into the next room. Plan your room-clear to bank abilities for the next encounter, especially before Room 5 and Room 6.
Step-by-Step Strategy: 5 Actionable Sequences
Sequence 1: The Perfect Room 1 (Learn the Loop)
- Hold B immediately. Confirm time slows.
- Crank-aim at the nearest grunt. Release B.
- Watch the hero's trajectory. Note the bounce angle.
- Cycle to the next hero. Repeat.
- After landing 5 hits with a hero, test their ability (press A).
- Practice the WJC: aim at a wall at ~90 degrees, watch the dead-drop.
- Clear the room only when all three abilities are charged.
Sequence 2: Banked-Ability Room 3 Clear
- Enter Room 3 with all abilities charged (from Room 2 practice).
- Launch Mage to center. Press A for Burst. This should hit both Turrets and the cluster.
- Switch to Ace. Duel the Charger to interrupt it.
- Launch Healer center. Press A for Heal.
- Finish Turret stragglers with direct shots.
- Exit with full ability charges banked for Room 4.
Sequence 3: The Room 5 Priority Kill Order
- On entry, launch Mage center immediately. Burst.
- Ace Duel on Charger 1.
- Healer heal the damaged side.
- Focus Turret A with direct shots (it cannot dodge).
- Turret B next. Then Turret C, Turret D.
- Clean Charger 2 with Duel.
- Mop up grunts.
- Bank Mage's next charge before room clear.
Sequence 4: Boss Phase 1 Survival Loop
- When minions spawn, launch Mage to the side nearest the spawn. Burst.
- Immediately cycle to Ace and launch toward the Boss, but do NOT approach the aura.
- Launch Healer center. Press A for Heal.
- Repeat this 3-wave loop: Burst minions → poke Boss with Ace → heal.
- Only switch to full offense once the Boss drops below 12 HP.
Sequence 5: The Speedrun Room Order
- Room 1: 30s. One Burst, two Duel finishers, go.
- Room 2: 45s. Corner shot into the pillar cluster.
- Room 3: 1m 15s. Turrets via Healer, Charger via Ace.
- Room 4: 1m 30s. WJC positioning to skip aim time.
- Room 5: 2m. Mage-first, Turrets in order.
- Room 6: 2m. Phase discipline, no wasted seconds.
- Total: ~8 minutes.
Advanced Tips: What Experienced Players Know
- The 45-degree rule. Aiming at 45 degrees gives the most predictable ricochet. Shallower angles skim, steeper angles dead-drop. Internalize this and every room becomes readable.
- Bank charges, don't spend them. Exiting a room with charged abilities is a strategic choice. The difference between entering Room 5 with 0 charges vs. 3 charges is often the difference between a clear and a wipe.
- Duel is a defensive tool. Do not think of Ace's ability as pure damage. Against Chargers and the Boss, Duel cancels their windup. Using it to interrupt is worth more than the 9 damage.
- Healer is the run. If you protect only one hero, protect Healer. A run with a dead Healer in Room 4 is a dead run.
- Enemy aggro is exploitable. Enemies target the hero on the floor longest. Leave Healer on the floor as bait while Ace and Mage reposition. She has the HP to take the hits.
- The crank is your precision tool. Digital aiming would make this game brutally hard. Use the crank's fine range for micro-corrections, full rotations overshoot.
- Practice the WJC deliberately. The dead-drop is usually a mistake, but it becomes a positioning tool once you control it. In Room 4's corridor, WJC is the fastest way to land a hero exactly where you need them.
- Turret geometry. Turrets fire in fixed patterns. Learn the pattern, then launch through the gap. Healer can tank the projectiles, so use her as the turret-killer.
- Speedrun relic picks: S-Tier instantly. A-Tier instantly. B-Tier if you must. Never stop to deliberate. Know your picks before the relic screen.
Speedrun Tips (Sub-8 Minutes)
- Skip Healer except for heals. In a speedrun, you only use Healer when someone is below 50% HP. Otherwise, keep her benched.
- Mage-first every room. Open every room with Mage Burst from center position. This clears 30-50% of enemies instantly.
- Ace cleanup. Follow immediately with Ace. Use Duel on the nearest survivor.
- Never full-clear. If a room has 1 straggler with 1 HP, launch any hero at it and keep moving. Do not wait for perfect positioning.
- No hesitation on relics. Know what you want before the relic screen appears. S-Tier → pick instantly. Anything else → grab the first option and go.
Target splits:
- Room 1: 30s
- Room 2: 45s
- Room 3: 1m 15s
- Room 4: 1m 30s
- Room 5: 2m
- Room 6: 2m
- Total: ~8 minutes
Playdate Hardware & Comfort Tips
Dungeon Bounce lives or dies on input precision, so the way you hold the hardware matters as much as the way you aim.
- Stabilize the crank hand. The Playdate is light, and a floating console drifts while you crank. Rest the device on a table, a knee, or brace it against your chest. Keep the crank between thumb and index finger for small movements, and use the full palm for big 180-degree sweeps.
- Use the time-slowing to your advantage. Because holding B slows the game to ~30% speed, you never need to rush an aim. Long, deliberate crank movements beat fast flicks every time.
- Screen readability. The 1-bit 400x240 screen has no color contrast to fall back on. In bright light, angle the screen away from glare. The heroes' shapes (triangle, square, circle) are your color-coding: read the shape, not the shading.
- Battery and session length. A full run takes 10-20 minutes. The Playdate's battery handles multiple runs, but the crank and constant screen updates drain faster than passive games. If you are chasing a no-death clear, play plugged in or with a fresh charge.
- Practice on the Simulator. The Playdate SDK includes a Simulator that runs .pdx files on your computer. You can practice Room 1 and Room 2 with a mouse or keyboard without touching your device. The physics feel slightly different on a mouse, so use the Simulator for strategy reps, not for final aim calibration.
- One-handed play is possible, not optimal. All inputs sit on the right side of the device (B, A, crank, D-Pad). You can play one-handed, but two-handed bracing gives you the stability that tight shots demand.
Damage Math: Every Number That Matters
Dungeon Bounce never shows you a damage table. Here is the full arithmetic, worked out from the official values: direct hits deal 5 damage, Duel deals 3 damage on each of 3 hits, Mage Burst orbs deal 5 damage each, and Heal restores 3 HP. Enemy HP: Grunt 3, Charger 5, Shielder 5 plus shield, Turret 8, Boss around 20.
| Target | HP | Direct hit (5) | Duel (9) | Hits to kill |
|---|---|---|---|---|
| Grunt | 3 | Overkill, dies | Overkill, dies | Any contact |
| Charger | 5 | Dies exactly | Dies exactly | 1 |
| Shielder | 5 + shield | Shield absorbs 1, then dies | Shield breaks, 4 damage spills | 2 hits (1 must bypass shield) |
| Turret | 8 | 2 hits | 9 kills it outright | 2 direct, or 1 Duel |
| Boss | ~20 | 4 hits | Takes 9, needs 11 more | 4 direct + abilities |
Three conclusions fall out of this table:
- Chargers die to anything. Stop saving abilities for them. A single direct hit from any hero clears one. Ace's Duel on a Charger is only worth it for the interrupt, not the damage.
- Turrets are Duel's best non-boss target. 9 damage removes an 8 HP Turret in one ability, no aiming required. Compare that with two aimed direct hits through bullet patterns.
- The Boss is a 20 HP wall with a hard floor of 4 direct hits. No relic combination gets you under 3 attacks on the Boss. Duel (9) plus one direct hit (5) plus Burst splash (5) is 19, one short. Plan the kill sequence around abilities, not around direct hits.
Effective HP per Heal use: 3 HP to every hero in radius, Healer included. A full-party heal is worth up to 9 HP. Blessing of Restoration makes that 12. Over a 6-room run, the difference between positioning your heals well and badly can exceed 20 HP, which is more than the Boss deals across an entire fight.
Charge economy: every ability needs 5 hits. A 3-enemy room cleared with direct hits and one or two multi-bounce launches usually fills 1 to 2 gauges. Rooms 4 through 6, with 7 or more enemies each, can charge everything. If a gauge is full and the room is almost clear, spend it: leftover charges are the only wasted resource in this game.
Relic Synergies and Draft Priority
The relic screen shows two options per room. Individual relic values are only half the story; the way relics stack decides runs.
The heal-scaling package (strongest in the game). Blessing of Restoration (+1 HP healed) compounds with HP Crystal (+2 HP to all heroes) and with every additional hero kept alive. A run that takes both by Room 3 enters the Boss fight with 10 HP heroes and 4 HP heals, which is 30 HP of total party buffer against a Boss that deals 1 to 2 damage per hit. Nothing else in the pool scales this hard.
The cooldown engine. Quick Hands (-15% cooldown) stacks multiplicatively with itself only if offered twice; the game's pool rarely does that, so value it as a flat speed-up. Its real strength is not DPS. Faster cooldowns mean Ace and Mage come back sooner, which means more hits landed per room, which means abilities charge faster. Quick Hands into an early Mage Burst is a Room 5 clearer.
Arcane Amplifier math. +2 damage per orb takes Burst from 40 to 56 potential. Against the Boss, orbs that would deal 5 now deal 7, so the Burst alone covers a third of the Boss bar. Against Grunts, every orb touch is now an overkill, which matters because orbs pass through enemies: each orb can chain multiple kills.
Draft priority order:
| Priority | Relic | Take it when |
|---|---|---|
| 1 | Blessing of Restoration | Always. Scales with everything. |
| 2 | HP Crystal | Always, especially before Room 4. |
| 3 | Arcane Amplifier | You have Mage Burst banked or play Mage-heavy. |
| 4 | Quick Hands | Your aim is good; more launches is more damage. |
| 5 | Sharpshooter's Mark | Your direct-hit rate is above 70%. |
| 6 | Speed Boots | Only for speedruns; the aim penalty is real. |
| 7 | Ricochet Rune | Avoid. The extra bounce is randomness, not power. |
| 8 | Fortune's Favor | Avoid in any run you care about. |
Anti-pattern: taking Sharpshooter's Mark in Room 1. +2 damage on direct hits changes nothing in Rooms 1-3 (everything except Turrets dies in one hit anyway) and its value only appears in Room 5. If the choice is between an early scaling relic and an early damage relic, scaling wins every time because it compounds across four more rooms.
Practice Drills: Train Aim Between Runs
Ten minutes of drills beats an hour of full-run attempts. Each drill uses Room 1 or 2, then deliberately dies or restarts.
Drill 1: The Clean Sheet (Room 1). Clear all 3 Grunts with 3 launches, no bounces, direct hits only. This calibrates your crank-to-angle mapping. Pass: 3 for 3. When you can pass five runs in a row, your baseline aim is solid.
Drill 2: Double Tap (Room 1). Launch a hero so that one trajectory hits 2 Grunts with wall bounces, then finish the third with a second hero. Pass: room cleared in exactly 2 launches. This trains multi-enemy trajectory planning, the skill Rooms 4-5 demand.
Drill 3: The WJC Ladder (Room 2). Use the wall jump cancel to drop each hero on a specific pillar corner, one at a time. Pass: all three heroes positioned within a hero-width of target. WJC is the positioning tool that separates mid-tier players from good ones in the tight Room 4 corridor.
Drill 4: Square Banking (Room 2). Using only Healer, kill both pillar-campers via 90-degree bank shots off the back wall. Pass: 2 enemies, 2 launches, Healer never directly aimed at an enemy. This drill teaches you the square's surgical predictability, which is your Turret-killing technique in Room 3.
Drill 5: Burst Geometry (Room 2). Charge Mage's Burst on the first Grunt pack, then fire it from 5 different floor positions across repeated attempts. Note which positions hit both pillars. Pass: you can name the center-bias of Burst coverage without testing. This is the room-opening decision that sets up every clear.
Session structure: 5 minutes of Drills 1-2 as a warmup, then 5 minutes on the one drill matching your current wall. Most players stall at Drill 3; WJC is genuinely hard and genuinely worth it.
A 7-Day Improvement Plan
One week of short sessions takes a new player from first death to first clear. Each session is 15-20 minutes, one to three runs.
Day 1: Ride the tutorial. Three runs. Do not aim for progress; aim for comfort with Hold B, crank aim, and release. By the end, you should clear Room 1 without missing a launch.
Day 2: Learn the shapes. Three runs focused on trajectory differences: Square reflects at 90 degrees, Triangle widens, Circle scatters slightly. Deliberately fire each hero at the same wall from the same spot and watch the difference.
Day 3: Corner shots. Two runs in which you forbid direct hits in Room 2. Everything must go through a bounce. This forces the corner-shot geometry that Rooms 3-5 require.
Day 4: Ability discipline. Two runs with one rule: never press A on the first enemy you see. Bank every charge into the next room. Notice how much easier Room 3 becomes when you enter it with 3 charges.
Day 5: Healer priority. Two runs in which Healer is the first hero launched in every room and the last hero you ever leave in danger. Most first clears happen on the day the player stops treating Healer as a benchwarmer.
Day 6: Room 4 under pressure. Run until you clear Room 4 twice. Use WJC drops for positioning, heal immediately after every Shielder engagement. Expect failures; this is the spike.
Day 7: The full clear. Fresh session, no warmup needed. Enter Room 5 with banked charges, follow the priority kill order, respect the Boss phases. If Day 7 fails, the fix is almost always one of: heals used too late, Burst spent on single enemies, or Duel wasted on Grunts.
Checkpoint stats: by Day 3 you should reliably reach Room 3; by Day 5, Room 4; by Day 7, the Boss is winnable. If you are behind, add a session repeating the previous day rather than skipping ahead.
Troubleshooting: When Runs Go Wrong
Symptom: dying in Room 3 with heroes scattered. Cause: launching without a landing plan. Every launch should end with the hero in a defensible spot, not wherever the bounce dies out. Fix: pick the landing quadrant before you aim, then WJC or shallow-angle to reach it.
Symptom: Healer dead by Room 4. Cause: using her as an afterthought, launched only when someone is already hurt. Fix: launch her first in every room, keep her central, and treat her 8 HP as the party's most valuable resource. A dead Healer is a doomed run.
Symptom: always one ability short in Room 5. Cause: spending charges the moment they fill. Fix: the banking rule. Exit every room with at least one charge; enter Room 5 with two or three. Kill the final enemy of a room with a direct hit, not an ability, whenever the room's remaining threats allow it.
Symptom: aim drifts during precision mode. Cause: floating the console while cranking. The Playdate weighs almost nothing and your wrist has micro-movement. Fix: brace the device on a table or knee, grip the crank thumb-and-index, and make small deliberate movements. If you overshoot, release nothing, just wait: time is slowed and the shot costs nothing.
Symptom: Turret bullets feel unavoidable. Cause: fighting them head-on. Turret patterns are fixed. Fix: approach from behind walls that block the pattern, or bank Healer off the back wall to kill them from odd angles. Healer tanks hits better than anyone; she is the designated Turret-killer.
Symptom: Boss never dies, minions overwhelm. Cause: skipping the phase discipline. Phase 1 is minion control, not Boss damage. Fix: clear 3 minion waves before touching the Boss, Burst on every spawn, Duel only to interrupt, full offense below 12 HP.
Symptom: runs feel samey and progress stalls. Cause: drilling the same successful pattern. Fix: deliberately practice the skill you are worst at (most players: WJC or bank shots). The skill ladder in this guide is ordered; attack the rung you have not climbed.
Symptom: the game won't appear on the device after sideloading. Cause: common sideload mistakes. Fix: make sure you extracted the .pdx folder from the zip (uploading the zip itself fails on the Data Disk method), refresh the game list on the device after a wireless sideload, and check that you are logged into the same Playdate account on play.date that the device uses. Old pre-February 2023 sideloads can create duplicate entries; remove them from the Sideload page.
Installing Dungeon Bounce on Playdate
The itch.io download gives you dungeon-bounce.pdx.zip (130 kB). There are three official ways to get it onto your Playdate:
Method 1: Wireless via the Playdate website (easiest)
- Log in to your Playdate Account at play.date.
- Go to your Account page, then the Sideload page.
- Drag the .pdx.zip file (or the extracted .pdx) onto the upload area.
- The game is uploaded to your account and becomes available on any Playdate logged into that account.
- On the device, open Game Library (or Settings/Games on older system versions), refresh the list, and find Dungeon Bounce.
This method survives resets and device swaps. Even if you wipe your Playdate or buy a new one, the game stays in your account library.
Method 2: USB via the Playdate SDK Simulator
- Download and install the Playdate SDK.
- Connect your Playdate via USB and unlock it.
- Extract the zip, then open the .pdx folder (not the zip) in the Playdate Simulator.
- From the Simulator's Device menu, choose Upload Game to Device.
- The game uploads and launches automatically, and stays installed.
Method 3: Data Disk mode (no SDK required)
- Connect your Playdate via USB.
- Enter data disk mode either way:
- Settings → System → Reboot to Data Disk, or
- Hold Left + Lock (top edge) + Menu (round button, top-right) for a few seconds until the screen reads "Sharing DATA segment as USB drive."
- Open the mounted PLAYDATE volume on your computer.
- Open the Games folder and place the extracted .pdx folder inside (not the zip).
- Unmount the PLAYDATE volume. The game appears on your device.
Note: If you sideload multiple versions of the same game, only the latest version stays available on the device. You can clean up duplicates from the Sideload page on play.date.
Developer Background
Dungeon Bounce comes from matheus, a solo Brazilian developer. On itch.io, matheus posts prototypes for the Playdate community; Dungeon Bounce and Dékalus (a turn-based card game) are his two public Playdate experiments. His commercial work lives under the studio name Mechar Software, a one-person outfit that describes itself as focused on "games and software experiences," with titles like Pongerground on itch.io.
This background explains the game's shape. It is a prototype with a tight, finished core loop: six hand-built rooms, three heroes, one relic pool. There is no meta progression, no difficulty selector, and no content treadmill. The polish budget went into the physics and the aim feel, which is exactly where this game needed it. Updates may add rooms, heroes, or boss variants, but the current build is complete and fully playable as-is.
Comparison With Similar Games
Dungeon Bounce sits at the intersection of three genres: pinball, dungeon crawler, and precision arcade. Here is how it stacks up against the neighbors:
| Game | Platform | Core Loop | How Dungeon Bounce Differs |
|---|---|---|---|
| Dungeon Bounce | Playdate | Launch heroes pinball-style through 6 rooms | Crank-aim precision, party management, relic runs |
| Legend of Etad | Playdate | Traditional top-down dungeon crawling with RPG progression | You walk in Etad; in Dungeon Bounce you only launch. No inventory, no leveling. |
| Binary Dungeon | Playdate | Roguelike dungeon crawler with 70+ items and 20 skills | Dungeon Bounce strips the item bloat down to 3 heroes and a relic pick per room. |
| Pinball games (any) | Arcade | Flippers keep a ball alive on a table | No flippers, no ball loss. You are the launcher; enemies are the targets. |
What makes Dungeon Bounce unique: it removes the walk. Most dungeon crawlers are about positioning your character over time. Dungeon Bounce compresses positioning into a single instant, the moment you release B. Every decision is a trajectory decision: angle, shape, hero, ability charge. That compression is what makes a 10-minute run feel dense, and it is the reason the game rewards pure aim practice more than any other Playdate crawler.
Common Mistakes: Detailed Breakdown
| Mistake | Why It Kills Your Run | Fix |
|---|---|---|
| Hero stacking | Multiple heroes on the same spot. One enemy attack hits all of them. | Spread them out. Launch to different quadrants. |
| Ignoring the Healer | Healer sits idle while Ace and Mage take damage. No recovery available. | Cycle Healer in every rotation even if nobody needs healing. Keeps her charging. |
| Spamming one hero | Other heroes are useless. Total DPS drops by 66%. | Set a mental timer: switch every 2 seconds. |
| Using abilities immediately | You might waste Mage Burst on 2 enemies when 5 are about to spawn. | Wait. Let enemies group. Use abilities at peak value. |
| Not using abilities at all | Leftover charges at room-clear are lost forever. | If a room is almost clear and a hero has a charged ability, use it. |
| Bad heal positioning | Healer heals herself but misses Ace and Mage standing 2 pixels outside the radius. | Launch Healer between the damaged heroes before pressing A. |
| Panic launching | Holding B is free. Taking 10 seconds to aim is fine. | Breathe. Slow is smooth. Smooth is fast. |
| Ignoring banked charges | Entering a hard room with 0 charges when you could have exited the previous room with 3. | Plan room clears to bank abilities. |
| Chasing the Boss aura | Standing in the aura to land one more hit. The HP loss is never worth it. | Respect the aura. Poke and retreat. |
FAQ
How long is a full run? 10-20 minutes for a first clear. Sub-8 minutes with practice.
What happens if a hero dies? They are dead for the rest of the run. You continue with the remaining heroes. If all three die, the run ends.
Can I save mid-run? No. Runs are single-session. Clear all 6 rooms in one sitting.
Is there any RNG? Enemy spawns are fixed per room. Relic choices are randomized from a pool. No other RNG.
Will the game get more content? Status is "Prototype." The core loop is complete and fully playable. Updates may add rooms, heroes, or boss variants.
How do I install this on Playdate? Three ways: wirelessly through the Sideload page on play.date (easiest), via USB using the Playdate SDK Simulator's Upload Game to Device, or via Data Disk mode (hold Left + Lock + Menu to mount the device, then drop the .pdx into the Games folder). Full steps in the Installing section above.
Can I play it on PC? The current build is Playdate-only. The itch.io page lists it as a Playdate game with a .pdx.zip download. There is no PC emulator build at this time, though the Playdate Simulator (in the Playdate SDK) can run it if you sideload the .pdx.
What is the maximum theoretical score? No score system in the current build. The goal is simply to clear all 6 rooms with all 3 heroes alive.
Is there a New Game Plus or higher difficulty? Not in the current prototype. The difficulty comes from mastery. The rooms are fixed, so improvement is entirely skill-based.
Which hero should I upgrade first with relics? The Healer. HP Crystal and Blessing of Restoration both compound on her. A tankier Healer means a safer run, and her healing scales with the party's total HP pool.
What is the fastest way to kill a Turret? One charged Duel (9 damage beats 8 HP) with no aiming, or two direct hits. If neither is available, bank Healer off the back wall: square bounces are the most predictable path to a rear-angle hit.
How much damage is a full-party heal worth? 3 HP per hero in radius, up to 9 with all three heroes grouped. Blessing of Restoration raises that to 12. Across a run, well-positioned heals are worth more than any damage relic.
Is Mage Burst really worth 40 damage? The 40 ceiling assumes all 8 orbs return to hit one target, which is rare. Real value comes from orbs passing through groups: 3 Grunts touched by 4 orbs is 60 damage. Position centrally and treat 40 as the floor in packed rooms, not the ceiling.
Why do my shots dead-drop instead of bouncing? You are hitting the wall at close to 90 degrees. That is the wall jump cancel. Use it deliberately for positioning, or shallow your entry angle toward 45 degrees for a predictable ricochet.
When should I stop saving charged abilities? Two hard rules: never enter the Boss room without Mage Burst banked, and never leave a finished room with a full gauge. Between those extremes, bank charges for Rooms 4 through 6 and spend freely in Rooms 1-3.